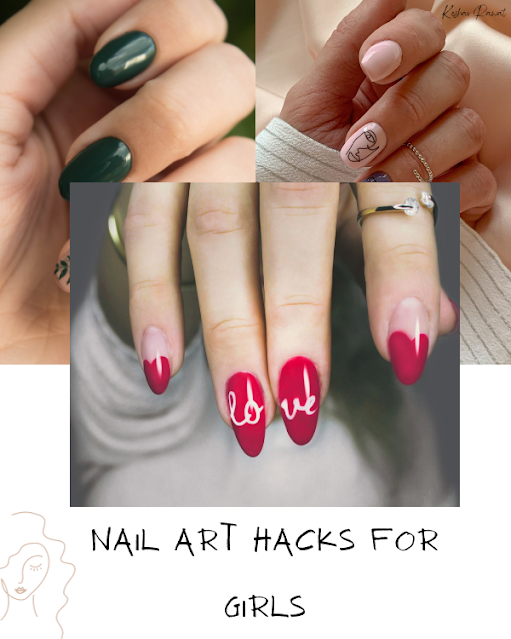
Nail Art Hacks For Every Girl Need to Know
Nail Art Hacks For Every Girl Need to Know
Painting nails and making them
look larger is a personal choice influenced by a combination of fashion,
culture, self-expression, and individual preferences. It allows people to
enhance their appearance, boost their confidence, and engage in a creative and
relaxing self-care practice. Whether it's for a special occasion or a daily ritual nail art offers a
versatile means of self-expression and personalization.
Today we will tell you some hacks
using which you can make your nails beautiful.
1. Nail Care Basics:
Taking care of your nails is the first step to beautiful nail art. Trim and shape your nails regularly to maintain a clean look. Keep them clean by washing them and gently pushing back the cuticles. Moisturize your nails and cuticles daily to prevent dryness and cracking.
2. Nail Strengthening:
If you have brittle nails, strengthen them with a DIY nail soak. Soak your nails in a mixture of olive oil and lemon juice for 10-15 minutes every week. This natural remedy helps to fortify your nails, making them less prone to breakage.
3. Base Coat Application:
Always start with a clear base coat before applying nail polish. This not only helps your nail art last longer but also protects your natural nails from staining caused by colorful nail polish.
4. Use the Right Tools:
Invest in quality nail art tools, such as dotting tools,
nail brushes, and nail stencils. These tools make intricate designs much easier
to create and add a professional touch to your nail art.
5. Easy French Tips:
Achieve a classic French tip
look by using adhesive band-aids or painter's tape. Place them just below the
tip of your nails, apply white polish on the exposed tips, and peel off the
tape for perfect French tips.
6. Water Marble Nail Art:
Create mesmerizing water marble designs by dropping nail polish into a cup of room-temperature water. Swirl the colors with a toothpick, then dip your nails in the design you like. Clean up excess polish with acetone and a brush.
7. Stamping Nail Art:
Nail stamping kits allow you
to transfer intricate designs onto your nails effortlessly. Apply a special
nail stamping polish to a plate, scrape off the excess, transfer the design to
the stamper, and press it onto your nails for stunning results.
8. Gradient Nails:
Achieve a beautiful gradient
effect by blending two or more nail polish colors using a makeup sponge. Dab
the sponge onto your nails, layering until you achieve the desired gradient.
9. Easy Nail Decals:
Design your nail decals by
applying nail polish onto a plastic bag. Once dry, peel off the polish and cut
it into your desired shapes. Apply a clear topcoat to your nails and place the
decals while it's still wet.
10. Striping Tape Designs:
Use striping tape to create
precise lines and geometric shapes on your nails. Apply the tape before
painting, then peel it off to reveal your crisp, clean lines.
11. Rhinestone and Stud
Embellishments:
Add glam to your nails with
rhinestones and studs. Use nail glue or a clear topcoat to secure them in place
for a dazzling 3D effect.
12. Matte Topcoat:
Transform your glossy nail art
into a trendy matte finish with a matte topcoat. This adds a unique twist to
your designs and helps them stand out.
13. Quick-Dry Drops:
Speed up the drying process by
applying quick-dry drops or spray to your freshly painted nails. This prevents
smudging and allows you to get back to your daily activities faster.
14. Cleanup Made Easy:
To clean up messy edges, use a
small brush dipped in acetone or a nail polish corrector pen. This ensures your
nail art looks neat and professional.
15. Seal the Deal with Topcoat:
Finish your nail art with a
high-quality topcoat to protect your designs and add shine. Reapply the topcoat
every few days to maintain the longevity of your nail art.
16. Practice and Patience:
Remember that nail art takes practice, and not every design will be perfect the first time. Be patient with yourself and keep experimenting with new ideas and techniques to improve your skills.
17. Nail Art Remover Pens:
Nail art remover pens are a handy tool for fixing mistakes without disturbing the rest of your design. Keep one on hand for quick touch-ups.
18. Custom Nail Polish Shades:
Create custom nail polish shades by mixing different colors together. Experiment to find your unique, personalized shades that match your style and mood.
19. Nail Art Inspiration:
Get inspired by browsing through nail art blogs, Pinterest, or Instagram. There are countless nail art ideas and tutorials available online to spark your creativity.
20. Fun with Textures:
Explore different nail textures by using techniques like sugar nails (sprinkling glitter on wet polish) or velvet nails (using flocking powder). These textures can add depth and dimension to your nail art.
By following these nail art hacks and practicing
regularly, you can achieve stunning and intricate nail designs at home. Whether you're a beginner or an experienced
nail artist, these tips will help you make your nails beautiful and turn them
into a canvas for your creativity.


Comments
Post a Comment